Car Photography Tips
Just because you don’t have the latest and greatest neck-breaking digital SLR or super expensive mirrorless camera doesn’t mean you can’t take good pictures. Even a camera on your phone can take good photos, especially given how much control you have now compared to just a few years ago. First and foremost, composition makes or breaks a photo, and shows the difference between a quick snapshot and a well thought-out photo. Some things may seem rather basic, but even I myself forget certain things from time to time.
Centered is rarely best
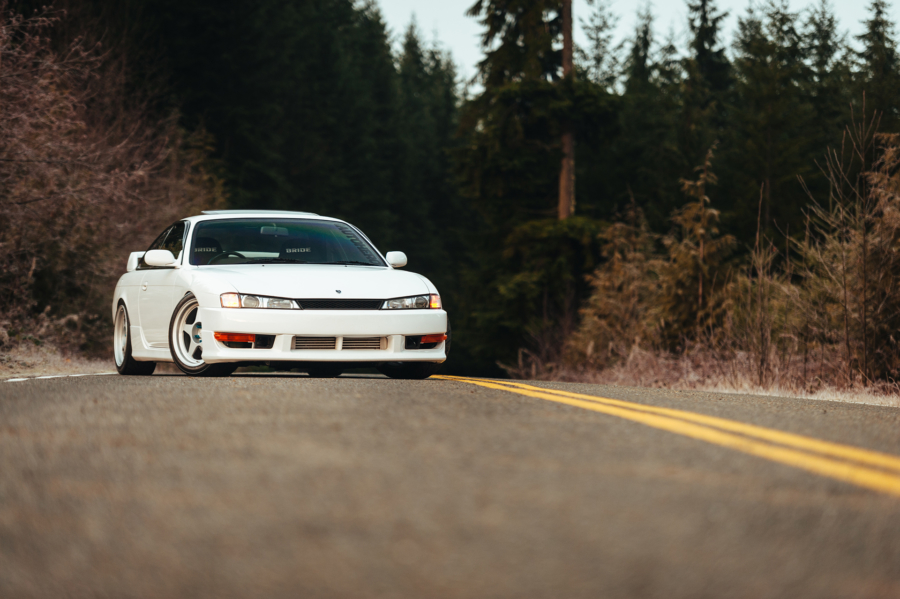
It’s easy to take a picture and put everything you want in the center, but unfortunately it doesn’t make for good photography. Generally, you want to follow the Rule of Thirds, which basically means that you want to put your subject at the cross section of two lines that cut your photo into thirds. An easy way visualize this is to imagine a tic-tac-toe board on your screen or viewfinder. Some cameras may even have this as an option to overlay on the screen. Here is an example of the Rule of Thirds in action:

I’ve overlaid a “Rule of Thirds” grid from Adobe Lightroom’s crop function so that you can see the grid lines. You can see how the car is situated right at what I call a “thirds crosspoint” to follow the Rule of Thirds. Keep in mind, while this is called a “rule,” it’s actually more of a guideline. I definitely recommend that you practice the Rule of Thirds so that you find yourself always doing it, and then you can get more creative with breaking the rule. This is one of the most important things to learn in general photo composition, so definitely make sure you master it before feeling like you can break it any time.
Angles can be good…and bad
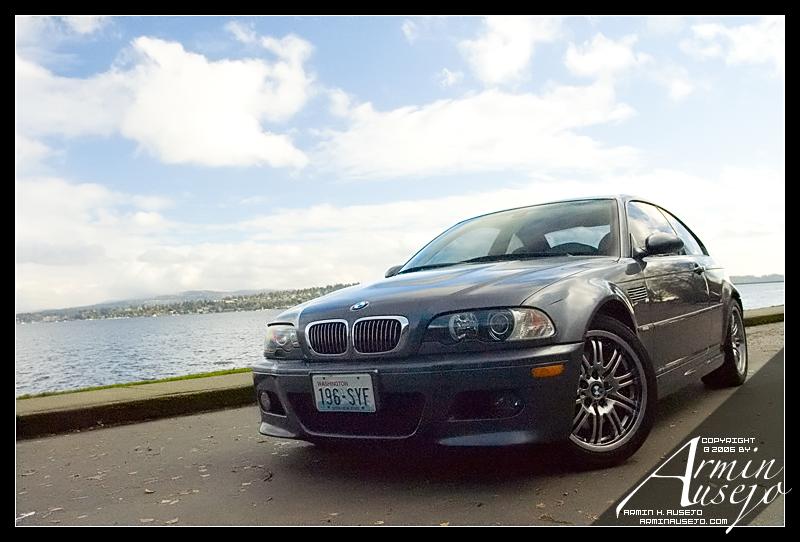
Going overboard on crazy angles (often referred to as a “dutch angle” or “dutch tilt” in the film world) to get a unique picture is very easy to do, but that doesn’t mean it’s the right thing to do. Remember that you want the viewer of your photo to truly grasp what you’re trying to capture, but if they have to break their neck or do a headstand to see it, then they’ll probably just look elsewhere. Make no mistake, there’s a time and place for crazy angles, but use them sparingly and make sure that everyone can tell what they’re looking at. Here is a very bad example from when I first started taking photos, and also note the very centered composition too:

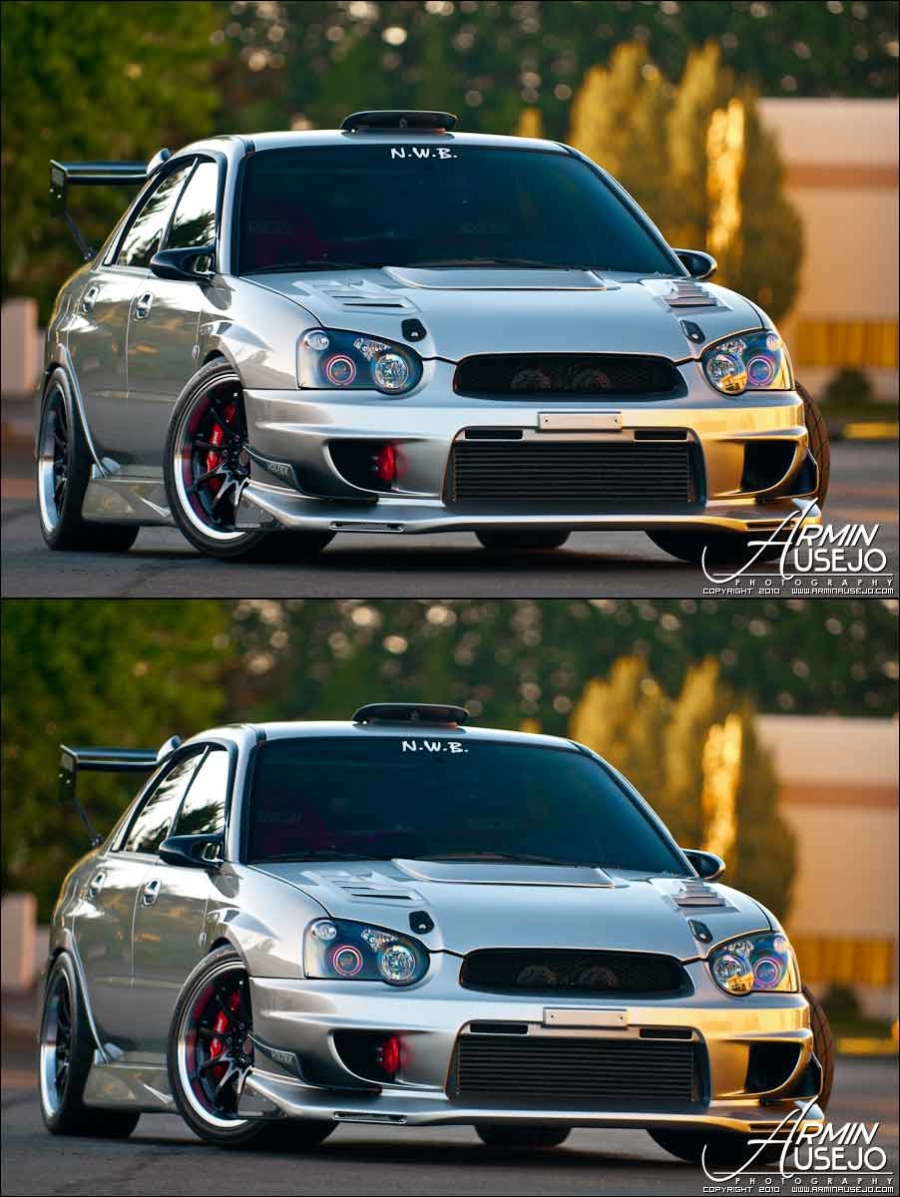
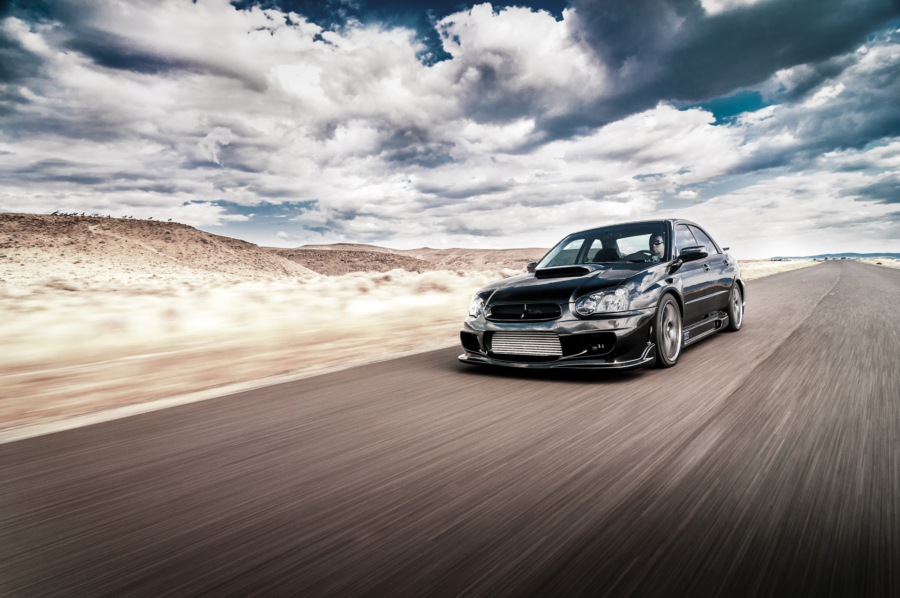
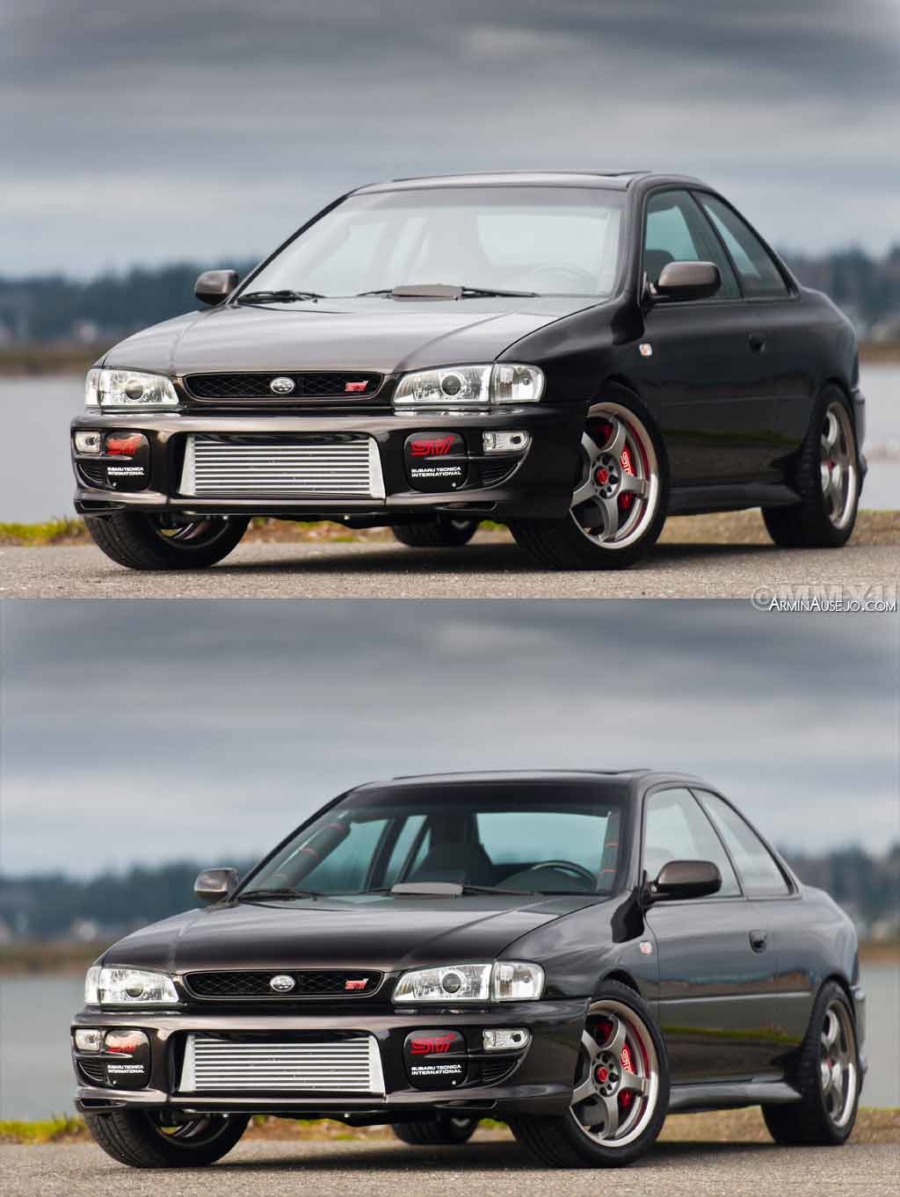
Also, keep in mind that a very slight angle can change the feel of a photo. Here is the same car, just with a slightly different angle to the photo. Which do you prefer? It all depends on what your purpose is:
Avoid the cut-off
Just a quick and simple tip. If you’re trying to take a picture of the whole car, make sure you actually take a full picture of the car, and don’t cut off the bumpers, wheels, spoilers, etc. It makes sense to cut off sections if you just want to single one or two things out (such as close-ups of individual parts in an engine bay), but if you want to get everything, pay attention not to cut off parts of your subject.
Wheels vs. Tire Tread
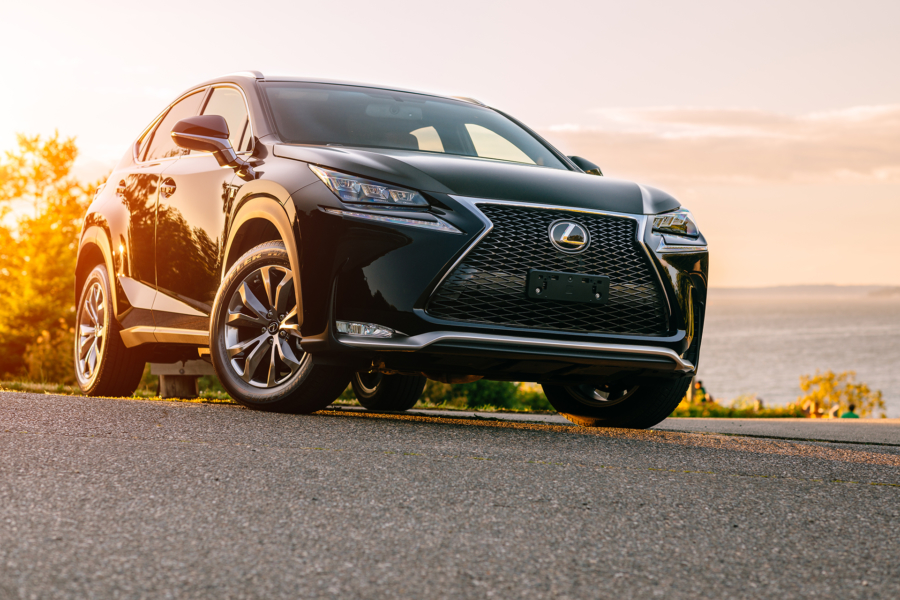
In this grudge match, the wheel always wins. If you’re taking a picture of a car, especially from ¾ position, angle the wheels so that the face of the wheel is facing the camera, not the tire tread. While some tire tread is really aggressive-looking, 99% of the time the photo will be better showing off the face of the wheel instead of the tire tread, especially if they’re aftermarket wheels. Even stock wheels can look good in a properly taken photo, but we won’t know that unless we actually see them, right? There will be times when you just want the wheels to be straight, but turning the wheels to face the camera often gives a more posed look that shows that you’ve taken your time and put effort into the photo, rather than just taking a photo of a car off the street. Here is an example using a 100% stock car:
The background is not just noise
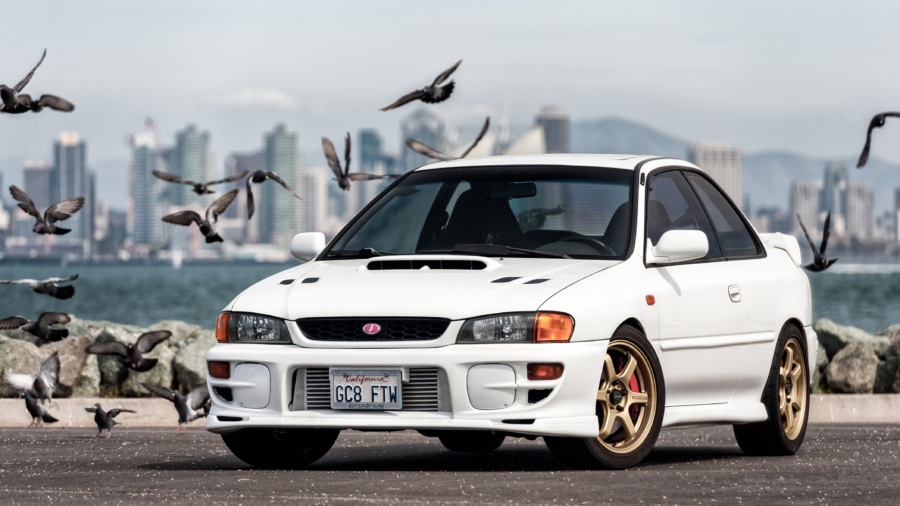
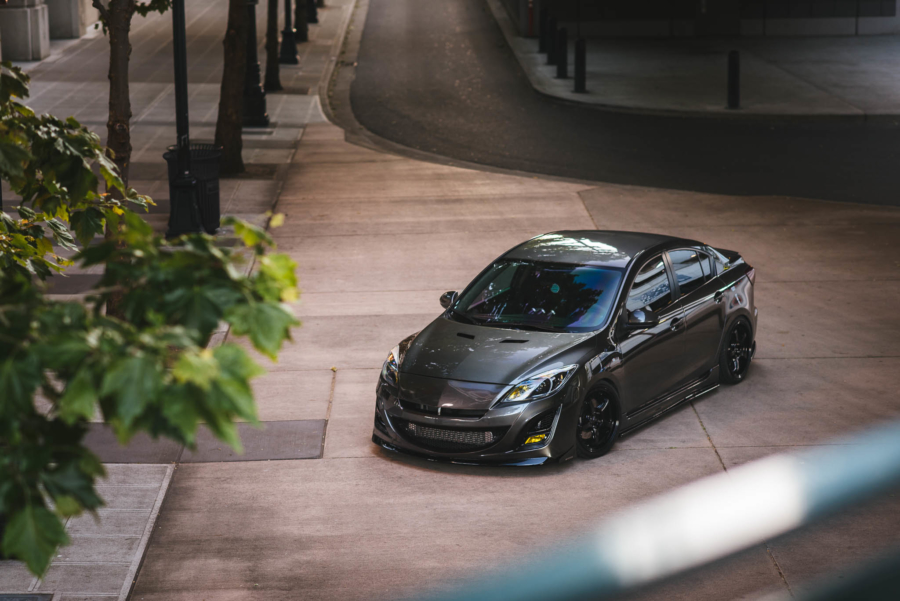
While the car is going to be the subject of your photo, that doesn’t mean that the background doesn’t matter. Even with proper composition, a good background can substantially help or wreck a photo. Industrial backgrounds are very overused, but it’s understandable to use if you’re in a pinch. Ideally, you want a background that helps add to the theme of a photo or just plain looks good overall. A driveway photo shoot isn’t all that great either unless the driveway is filled with a bunch more nice cars. Just be careful not to choose a background that blends in too much with your car, because then your subject won’t stand out. Here are a few of my favorite backgrounds that I’ve been able to use:


It is also very important to make sure there aren’t distractions in the background that interfere with your subject, such as trees or poles growing out of the car, power lines dominating the scene, or random garbage on the surrounding ground. Attention to detail is very important when it comes to your background, and can easily be the difference between a simple snapshot and an actual thought-out photo.
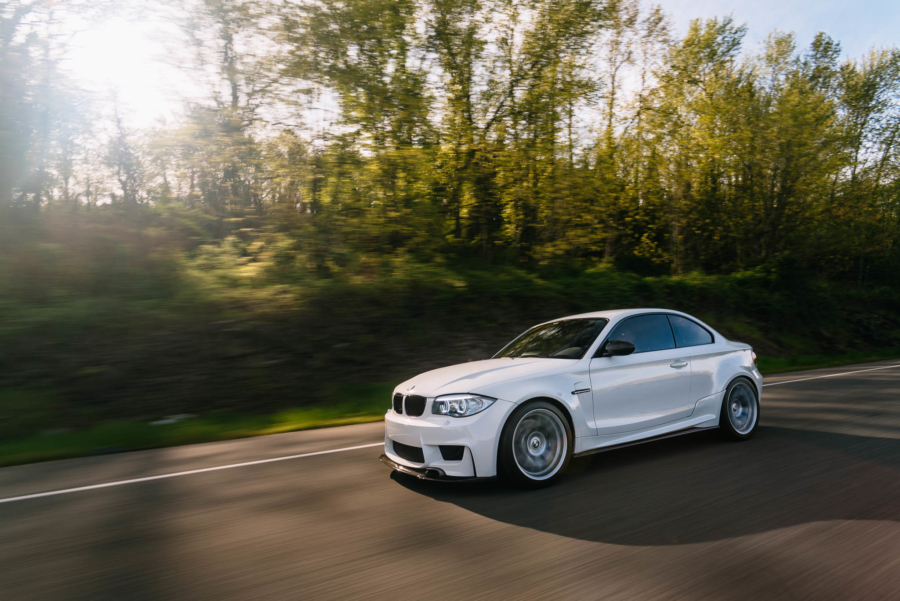
Camera elevation
A key point of any type of photography is to try to capture something that isn’t normally seen by your naked eye. Thus, try your best not to take photos from standard standing height. If you get real low or get real high, you’ll have a much better overall photo. Very rarely will you see me taking a photo from a standing eye-level position. I sometimes even bring a step ladder with me or get on top of something to get a higher elevated shot. And, don’t be afraid to get dirty with a low shot either. Here’s a high and a low example:
That just about wraps it up for basic composition. Please click the next tab over for capturing light.
Remember that when you’re taking a photo, you’re capturing how light is reflecting off of everything in the photo. No matter what camera you use, the amount of available light will dictate what your settings should be to capture an image, no matter if you set them yourself or your camera decides it for you. Light rules everything with an iron fist, and getting the proper exposure is key to a good photo. After all, if you can’t see anything, what’s the point?
Be careful with back lights
Generally speaking, you want to avoid back lights in car photography. Remember that typically you want your light source behind you, so that it lights up your subject. If you’re taking a photo of a car with the light source behind it, such as the sun or a streetlight, then you’ll more than likely get lens flare (the ugly green or brown series of circles that emanate from the light source in question) and your subject will not receive enough light. You can still make it work, but you just have to make sure you understand what problems might arise when you capture the photo. Another option would be to use artificial lighting such as strobes, flashes, or light painting, but those create their own limitations and don’t really fall under the realm of basic tips. Here is an example of getting a bit of a back light to work in your favor, but it’s still not the ideal situation:
High ISO / high-speed film is no substitute for a tripod
A tripod solves almost all of your focus and noise issues, whether you’re using a digital or film camera. If you don’t have a tripod, get one! It will be one of the best investments you can make. Sure, you can turn the ISO up or use high-speed film to increase your light sensitivity, but only at the expense of more noise and graininess in your photo. You often see this graininess in phone photos, since unless you’re using a third party app, you typically can’t control your ISO and the phone will just decide it for you. Ideally, you want to set your ISO to your camera’s lowest base ISO that you need in order to capture your photo. Your camera’s base ISO numbers can be found in you camera’s manual, but typically it’ll either be ISO 100 or ISO 200. Here’s an extreme example of what not to do from many years ago, when I forgot that my camera’s ISO was set to 1600, despite being the middle of the day:
If you’re really getting serious about your photography, make sure you don’t go cheap on your tripod. Even a slight breeze can cause a cheap, flimsy tripod to move or vibrate enough to throw off the focus of your photos. You’ll want a tripod that will properly hold the weight of your camera and lens, and is adjustable enough for your tastes. On top of that, you’ll also need to make sure the tripod head you choose can also handle the weight. Most good and stable tripod head and leg combinations will be in the $300+ range.
Avoid midday sun
If you can help it, try not to shoot in the middle of a bright sunny day. Generally, it will mess up your colors and create rather harsh reflections, especially from the windows. The best times to shoot are typically right before sunrise and right at or just after sunset. Cloudy days can be good, but you’ll need to pay close attention to where your shadows are, especially those created by clouds. An overcast day can almost be ideal for even lighting, but just about any shot pointed upward toward the sky is going to have a very overexposed, plain background. If you’re able to get a nice balance of blue skies, clouds, and soft lighting, then you can get capture something truly awesome:
Manage your reflections
Unless the car you’re shooting has a matte paint job, just about every car you shoot is going to act like a mirror. Managing reflections is vital to good automotive photography, since the last thing you want is for glare to ruin your photo. One of the easiest ways to help manage your reflections and glare, especially those given off from windshields and other glass, is to use a circular polarizer (CP) filter for your lens. The front of the circular polarizer rotates so that you can set it to remove the reflections of your choice. Here’s an example of the difference that the circular polarizer makes. The first photo shows how it looks without the polarizer, and the second shows what the polarizer does to the reflections on the windshield, hood, and more:
The circular polarizer will also help reduce glare when taking interior shots. I never leave home without my circular polarizer, and it should ALWAYS be in your camera bag. The only excuse not to have one is if you have a point and shoot camera that doesn’t support one. I always advise people to buy one that matches your lens quality — if you’re using a kit lens (the lens that came in a package with your camera when you bought it), then usually you can get by with a cheap circular polarizer filter. However, if you’ve upgraded your lens(es), you should upgrade your filter as well. I prefer B+W filters in general, but Hoya’s high end filters are good as well. Prices vary depending on the size of your lens, but you can typically get a good 77mm B+W filter for $80-90.
Don’t forget to also be mindful of reflections that can’t be controlled by a circular polarizer filter, such as things in the area surrounding the car. Watch out for distinct colors, lines (like parking lines), and even people that will show up in the paint of the car, and try your best to position the car to minimize these things.
Finally, I also often get questions about UV filters. Personally, I don’t like them and I don’t use them, because you’re really just adding another piece of glass to the front of your lens that doesn’t change or enhance your image quality whatsoever. If you use a cheap one, it might even make your image quality worse. However, some people just like to use them for protection and that’s fine, but I always advise to take them off when you’re actually taking photos.
Now that we’ve gone through capturing light, it’s time to click on the next and final tab for using your gear and equipment to its fullest.
Now that you’ve learned a bit about composition and making sure you capture light in the right ways, do you need to go out and buy a ton of new gear? Or can you still take good photos with what you have? The good news is, you can take awesome photos with even just your phone. It’s now time to put everything that you’ve learned to practice, but you also need to make sure you’re using your existing equipment to its fullest potential.
Making the best of your equipment
You don’t need the latest and greatest DSLR or mirrorless camera to take good photos, but cameras that let you change lenses definitely have more of an advantage because of the sheer variety of the photos you can take and the higher quality of the interchangeable lenses. However, that isn’t to say that you still can’t get good results out of a point-and-shoot or even your phone. Here’s an example I took of Rhenna’s Porsche 911 with my iPhone 11, and processed later in Adobe Photoshop with minimal edits:

In fact, many people end up spending a lot of money on a DSLR or mirrorless camera, but since they don’t take the time to really learn how to use it properly, their photos end up looking worse than if they used their phone. All you really need is the know-how to use what equipment you have properly, no matter what kind of camera it is.
Tripod, Tripod, Tripod
‘Nuff said. If you don’t have one, get one. I cannot stress this enough. Using a tripod will not only help give you a good, stable platform to take pictures from, but it’ll also help you slow things down so that you’re not rushing your shots. Setting up the tripod will also give you time to re-examine the scene and your composition. Are there distractions surrounding the car? Is the lighting good? Are you shooting from a different elevation other than standing eye level?

There will undoubtedly be times when using a tripod will be impractical or even impossible (most action photos, for example), but I’ll still default to the tripod on just about every automotive shoot that I do.
Adjusting your aperture and how it affects shutter speed and ISO
Ever wonder how photos have one thing singled out, and the rest blurry? That’s because the aperture is adjusted to shoot wide open, creating a blurred effect away from the focus point. Shooting “wide open” means that you lower your aperture down to the lowest possible ƒ-stop. Many lenses have a lowest ƒ-stop of ƒ3.5 (more often written as f/3.5), but other lenses can go down to ƒ1.8 or even ƒ1.2. On the other hand, using a higher ƒ-stop will keep more things in focus, but at the expense of letting in less light, which again leads to a tripod being a must. Experiment and see what kind of results you can get, since there is no right or wrong when it comes to your aperture. It all comes down to how you want to present your subject to your viewer. Switching your camera to aperture priority mode will help you play around with things. Also, remember that if you zoom in (in other words, use telephoto) for a photo and use a lower ƒ-stop, you’ll get even more blurriness away from your focus point. I use my telephoto lens with a low ƒ-stop very often to make a car pop out from the surrounding area. Here is an example of how different apertures can affect a photo, using an 85mm ƒ1.4 lens:

Also, remember that your aperture affects the amount of light going into your camera. A wider aperture lets in more light, which will consequently result in having to use a faster shutter speed to ensure proper exposure. Your ISO will also play a role here, since the ISO adjusts how sensitive your camera’s sensor is to the incoming light. It’s this tricky balance of these three main factors that affect your photo, and really the best way to understand this triangle relationship is to get out there and experiment.
One filter to rule them all
I stressed the use of the circular polarizer filter in the “Managing your reflections” section, so I’ll stress it here again. It really is a filter that I won’t leave home without, especially when it comes to automotive photography. The only other filter that I use often will be a neutral density (ND) filter, which basically acts like window tint to let in less light. This is helpful when you want to use a slow shutter speed, but the overall lighting situation is too bright. Otherwise, I prefer not to use UV filters or anything else that acts as another piece of unnecessary glass on the front of my lens.
Turn off your flash
There are certain ways to use a flash effectively on a car, but you usually need more than one, and it definitely won’t be the one attached to your camera since it creates a bit of a spotlight effect, which isn’t enough to cover the entirety of a car. Thus, keep it turned off, and refer to the tripod rule above one more time.
JPEG vs. RAW and post-processing
It’s important to understand what happens after you take your photo on your camera of choice, whether it’s a dedicate camera or even just your phone. If you’re shooting in JPEG mode, your camera’s manufacturer (Nikon, Canon, Sony, Apple, Samsung, etc) will apply its own formula of color saturation, contrast, sharpening, etc to the photo. With most cameras you can control this to a certain degree, but the options are typically very limited to settings such as “Vivid” or “Monochrome.” Thus, you’ve pretty much turned your photo processing over to your manufacturer to determine, much like how you’d just take your film to a developer and they’d have full control over everything. The way you can truly make your photos your own is to shoot in RAW mode where available. RAW is quite literally the raw photo data that your camera captures, and thus it doesn’t apply any adjustments that would normally take place when you shoot in JPEG. There are many technical differences between the formats, but in the end, RAW has all of your photo’s data, whereas with JPEG you lose data since the file is compressed. All DSLRs and mirrorless cameras allow you to shoot in RAW these days, and depending on your phone, you can also shoot in RAW as well through third party apps.
That doesn’t mean you can’t post-process JPEGs though. There’s no reason that you can’t apply more edits to a photo from your point-and-shoot or phone. Often times, you’ll take a photo that looks absolutely perfect right out of the camera, but even doing little things like a little sharpening or a little boost in saturation or contrast can turn your photo into something more. Just don’t go overboard with it! It’s very easy to go overboard with contrast and saturation especially. Too much contrast will remove definition and details from dark areas, and too much saturation can make a photo look very artificial. Use your best judgment and discretion, as you’ll know very quickly if something’s starting to look too extreme (that stereotypical Instagram filter effect). The good thing is, there are plenty of post-processing programs out there, even on your phone. I’m a big fan of Adobe Lightroom for Mobile, but I’ve also used VSCO and Snapseed in the past with great success.
You don’t NEED new camera gear

Photography is an addictive, and very expensive hobby. It gets even more expensive once you start shooting professionally! It’s very easy to get caught up in the newest camera and lens innovations, especially when you have brand rivalries trying to best each other. As awesome as all the new technology is, don’t make the mistake of believing that new camera gear will instantly make you a better photographer. Some of my best photos that you see here on this website were taken well over a decade ago on cameras that would be considered dinosaurs now. On top of that, the main manufacturers all make extremely good cameras even at the entry level price points, so you don’t need a $6000+ camera to take good photos. Try to max out the skills you’ve learned with the equipment you already have and once you’ve done that, you’ll know for sure when it’s time to upgrade.
Garbage In, Garbage Out
This is a mantra that I will always mention when it comes to photography. Post-processing can help make a good photo into an exceptional photo, but it can never help transform an already bad photo into an exceptional photo. If you don’t start out with a good photo, no amount of post-processing will make it awesome. At its root, that is main thing I’ve tried to stress in these car photography tips. If you start out with good composition, good use of light, and proper use of your equipment, then you will almost always end up with a great photo. However, if your photos starts off with bad composition, overly exposed or drastically underexposed, and your camera isn’t steadied with a tripod or doesn’t have the right aperture, shutter, or ISO settings, then you really can’t expect to be able to completely rescue the photo through post-processing. This is why the basics are important, and once you’ve gotten a good understanding or even mastery of the basics, then you’ll definitely be going down the right path toward great photography.
arminphotodotcom